Taking Apart a Miller Falls 104 Chuck
I recently purchased nice little Miller Falls 104 egg beater drill. I plan to do a full restoration eventually, but to use it in the mean time I wanted to get the sticking chuck working properly. I thought it would be easy to take a part but it proved rather difficult.
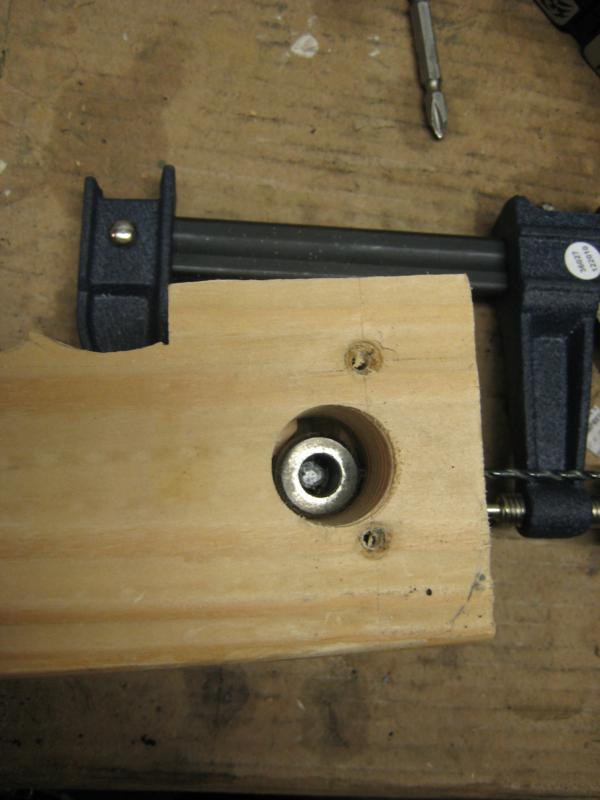
The first method I tried was just using some channel lock pliers with bicycle tubes for protection, but with that it didn’t budge at all. Even after letting it soak in some PB blaster it still wouldn’t budge, so I decided to send one of the experts on Miller Falls drills, George Langford, an email. He responded very quickly and said “channelocks tend to squash the shell of the chuck and make it even tighter on the base”. He then recommended making a little set of pads to hold the shell. Lastly, he told me the proper tool to use was a spanner, which fits in the hole seen below.
Step 1
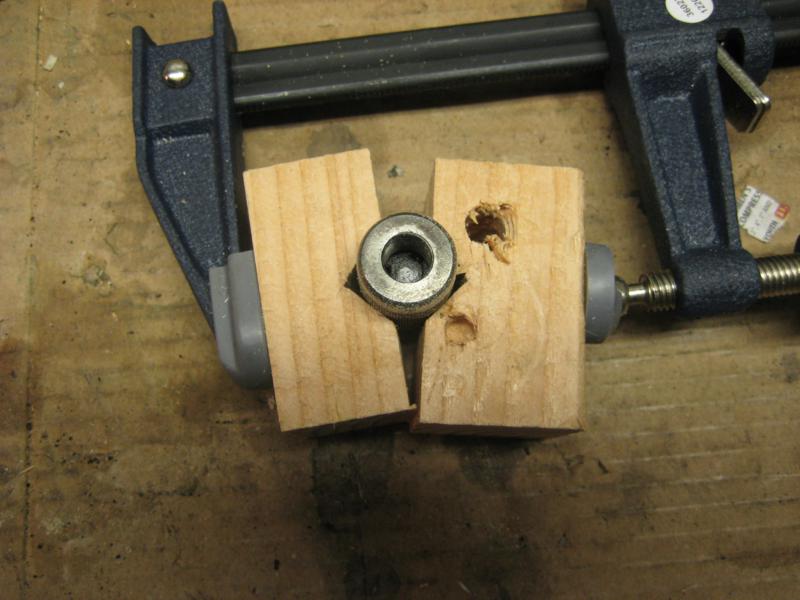
Make some little wood clamp pads like George suggested.
If you have a spanner to twist it off use that. I looked around online and adjustable spanners were over $40 which is 5 times as much as I paid for the drill so that option was out. Instead I made a “spanner”. Get some scrap material and bore a whole big enough for the top of the chuck to fit into.
 Next, find a drill bit where the smooth end fits well into the hole on the chuck. Then use that bit to drill a small hole in the scrap. Make the hole low, into the side, and have it intersect the bigger hole you made previously. You can see the hole location where the drill bit is sticking out below.
 Insert the drill bit backwards(like above) into the hole and put it in the chuck hole. The threads on the chuck are normal right hand threads, so now use it like a wrench and loosen the top of the chuck.
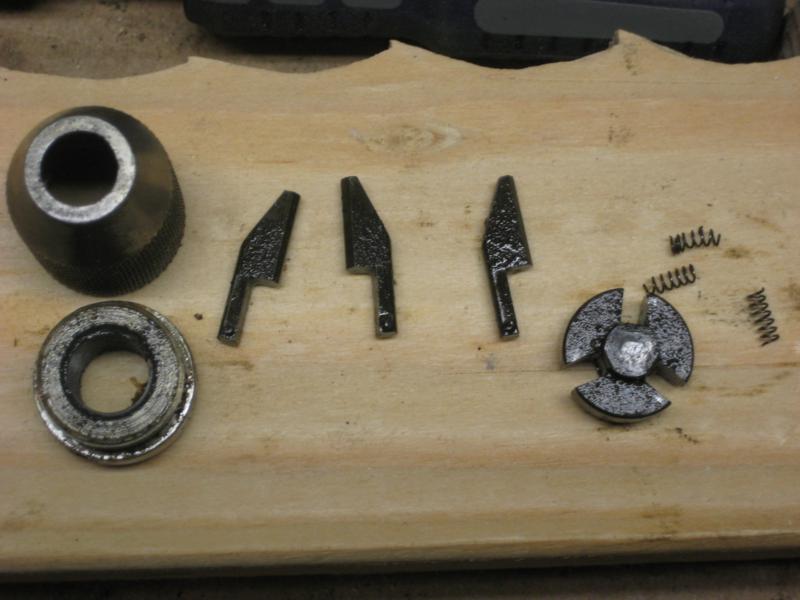
Inside you should find:
 Clean it up and be careful with those little springs they easily get caught on things and rocket off.
Thanks again George for the help!


